Tuesday, July 8, 2014

Photoshoot for work - Staff Pictures

I just completed a little project for work (you know - the dayjob that I haven't given up yet).  They wanted to get photos of each member of staff for use in newsletter articles, and being the official company photography bore, of course they came and sought my advice... which was their veiled way of asking me to do it for them.

I convinced them that casual/candid shots at a BBQ, which was their original plan, was probably not going to yield useful pictures of everyone, but if I set up a 'booth' type setting, I could control the lighting and background, and pose everyone in a similar way to get a set of consistent images, with a more professional feel to them.

My initial setup was done in our reception area, which has a nice big illuminated sign with the company logo that I wanted to use as a blurred backdrop.  To achieve that, I intended to use my 50mm lens with a big aperture like f/2.  Unfortunately, there wasn't enough space for me to stand far enough back to use the 50, so I had to revert to the kit 18-55 and a much smaller aperture, and have the background more in focus than I really wanted.

I finally got to use my new strobe for this project (see previous post), and also the boom arm to hold my reflector in place.  I used my Cactus V radio triggers to fire the strobe.  With the strobe in a softbox high to my right, and the reflector low to my left, I started off by using Shutter Priority mode at 1/160 to get a base exposure for the background (with the strobe off).  I then reduced that by 1 stop to darken the background a little, and put the settings into Manual mode.  Next, I grabbed a willing volunteer to stand in place while I took some test shots with the strobe on, to get the right exposure for the person, and tweaked the position of strobe and reflector.

Then it was a case of putting an X on the floor for people to stand on, and just getting people through.  I posed them all with their body facing towards the strobe, their face and shoulders halfway back towards me, and then their eyes looking at the lens.  With everyone having roughly the same positioning and pose, it gave a common feel to all the images, and made the lighting easy.  Having a mains powered strobe was a godsend as it recycled in less than a second each time (I was using it on about half power), and power output was consistent for every shot - I could have used one of my speedlights, but would probably have eaten through a set of batteries and ended up with 10 second plus recycle times.  One issue I did face, was that with staff members of varying heights, it wasn't always easy to line them up with the background, and with a few of the taller guys, I was standing on tip-toe to get the shot!

The next thing I did after completing that day's shoot, was to use FastStone Viewer to crop all the images to a square format, and used the rule of thirds grid to help ensure all the photos were of similar proportions.  I positioned their left eye on the upper right intersection, and adjusted the box to give a small clearance above their head.  Any lighting, colour tweaks, and sharpening were also done using FastStone at this point.  The last thing was to resize all the photos to 2000 pixels. I did use Photoshop on just a handful of people, in one case to combine the eyes from one shot with the smile from another, but in most cases, it was to help reduce reflections and shadows caused by glasses.

I got through about 25 people that afternoon, and then set up 2 more shoots in other locations, to get all but a handful (who presumably don't want their photos taken) of the rest.  One location was in the main office area.  I setup the lighting and posed people in exactly the same way, but pulled together a load of potted palms to act as my (distant and unfocused) backdrop.  My final location was out in the factory area.  I was lucky enough to be able to use one of our key machines as a backdrop during a 'down' day, and have that section of the factory cordoned off so we could dispense with all the normal safety gear while doing the photos.  Again, the lighting and poses were kept consistent with the first shoot.

All in all, just under 50 staff photos were produced, and everyone seemed pleased with the results.  It was a very enjoyable project.  My chosen pose and crop may be frowned upon by those that do this kind of thing as their daily bread and butter, but for my first 'corporate' photo shoot, I was very pleased with the outcome.  Now, if only I could have charged them even just $20 per person, I'd have a couple of new lenses now! LOL

Until the next time, happy snappin'.

PS - my thanks to Vito, our HR Manager, for agreeing to let me post his pictures as my examples.

Sunday, July 6, 2014

My first studio strobe

Yes, I've finally got a proper studio strobe and softbox. Using speedlights for off-camera lighting can be more convenient as they are certainly more portable, but recycle times can start stretching out once the batteries begin to lose their power. The strobe, being mains powered, will recycle in around 1 second every time (maybe 2 seconds if you are using it at full power).  The strobe also has a modeling light which helps reduce the trial and error with positioning light and subject.

Having looked at the strobes available in the normal camera stores and online, I couldn't justify the $400-500 price tags I was seeing for even fairly modest 200WS strobes, and the cost-effective Alien Bees that everyone seems to rave about, appeared to only be available for 120V (not much use to me here in Aus). So it was off to eBay for a search.

There are hundreds and hundreds of ads on eBay for cheap strobes, and lighting kits comprising multiple strobes, but be careful...  while the price may look attractive, just check out the specs. The one thing I saw time and time again on pretty much all the cheap models, was that their power range was shown as 8 'steps', or adjustable to 1/8 power. This is NOT equivalent to 8 f-stops. From full power to 1/8 is actually only a range of 3 stops - the equivalent of going from f/8 to f/11 to f/16 to f/22. I really wanted to try and find a strobe that had more control than that - similar to my speedlights which have the ability to go down to 1/128 power, which is a 7 stop range.

I found 2 potentials.  The first was a Pegasus P300A 300WS head supplied by a company called pro4aussie based in Victoria. It was around the $100 mark, but unfortunately, they were out of stock and could not supply me one back in March. Since then, the postage on their eBay ad has gone up to a whopping $100 - which is usually a sign that they still cannot supply the goods but don't want to take down the advert.

So option 2 was the DSLRKIT Flame-200 - a 200WS head for about the same price, but coming from China. After consulting with the dealer, it was (rather vaguely) confirmed that this head should have an 8 f-stop range, not just 8 steps from full down to 1/8 power. I gave the details to my family, who were clubbing together to get this for my birthday.

When the light arrived, my first disappointment was that it came with a European plug on the end of the (extra long) mains lead, but after a quick unplanned trip to Bunnings to buy a new plug, I was able to plug it in and test it. Everything worked, and it flashed OK (phew - always worry about anything glass or fragile coming through the post). The next slight disappointment was that the head has a 2 digit LED display on it, so I had assumed that the power would be adjustable in decimal increments as well as full stops - or at least in halves or thirds... but no, the power settings are 10, 20, 30, 40, 50, 60, 70, and 80.  So what is the point of the second LED digit, I hear you ask?  Yes - I'm wondering the same...  Oh well, this is actually only a very minor inconvenience, and if I ever really need to be that precise, then I can move the light stand slightly, or make the adjustment in camera. Just one more observation - the modeling light power is not adjustable, as it is on the more expensive strobes - I'm not sure I'd even class this as an irritation - simply an observation.

I have used the strobe on 3 photo shoots now (article on those due in the next couple of days), and have been very pleased with the ease of use, and consistent results. I use my Cactus V radio triggers to fire the flash (and there is a very convenient cold shoe on the underside of the casing so the receiver does not have to dangle on the end of the cable), though it also has a light sensor on the top and can work on 'slave' mode (haven't actually tried this yet).  The controls are very simple - plug it in and switch on the main (green) power button.  Switch on the modeling light if required. Adjust the power up or down (from 10 to 80, where 80 is full power) using the + and - buttons.  There is a test button to fire the flash manually, and a button to turn the audible beep on and off. If you have that on, then it beeps when the flash power has recycled. As well as the audible beep, there is a bright blue LED that shows when the flash is ready to go. And that is all there is to it. The front end of the head has a universal mount, with a nice recessed ring in it, that helps to secure a softbox or other fittings, and reduce the possibility of them slipping off.

So, the moment of truth... Today, I set up a test to make sure I would actually get 8 stops of adjustment.  By my reckoning, if I set up a shot with a very small aperture and the strobe on full power, then decreased the power and opened the aperture by one stop at a time, then in theory, all the pictures should have the same exposure. If you look at the settings in the table below, you can see that my lens doesn't have 8 stops of latitude, so for the final 2 tests, I had to also lengthen the shutter speed to achieve the same exposure value.

And here are the results (excuse the hastily thrown together testbed)...
 ...so not totally consistent exposure across the whole range of adjustment, but unless you are doing an exercise like this, it wouldn't really matter, as you would most likely be adjusting the light, aperture, shutter speed, angles, distances, and everything by eye anyway.  The important result for me is that the minimum power setting IS actually 8 stops away from full power, and not just 1/8th of it.

So am I pleased with it? Yes - absolutely.  A minor setback with the plug at the beginning, but otherwise, I'm very pleased. It may not be the most powerful strobe in the world, but I don't feel that at this point in my life, I need multiple 1200WS strobes to light a huge studio from all angles (since I don't have a huge studio), and it fits my needs.  I'd certainly consider getting a second one if my move towards portrait and/or product photography goes as I hope...

Until the next time,
Happy Snappin'

Friday, March 14, 2014

Valentine's Rose

See me in Flickr
I bought a single red rose for Karen, for Valentine's Day (I know, I'm just a soppy romantic...), and one evening, I noticed it caught in the light in our lounge, and felt compelled to try and catch it with the camera.

It was after dark, so the only light in the room was from a single wall light.  I wanted to try and catch a 'low-key' image with the beautiful red bloom against a mainly dark background.

The TV, with its large flat black screen (when switched off) looked like it might provide a nice backdrop, as long as I could get the angle right so there were no reflections on it.  I experimented for a while with both positioning, and also exposure, until I came up with this shot.

Unfortunately, importing the picture into the blog has reduced the quality a bit so I've included a link see it in Flickr.

Obviously, even in low light, the camera will try and give a 'properly' exposed image, and I specifically wanted it dark and contrasty, so I set the exposure compensation to underexpose by 1/3 of a stop, and used spot metering on the brightest part of the rose.  At a reasonably small aperture (I think it was around f/8) to get the whole thing in focus, I got a shutter speed of 30 seconds!  Wow - it was dimmer than I realised.

Just to ad a little 'bling', I gave the rose a quick spray with water to give the 'dew' effect, and then during the 30 second exposure, I also played a small torch over the top togive a few catchlights in those dewdrops.  Now, this had an unfortunate effect on the photo - the torch has bright white LEDs which actually give off a much bluer light than the incandescent bulb in the wall lamp.  The net effect was that the deep red bloom was actually now showing up with a pink colour cast.  A little playing in Photoshop managed to get rid of most of it, but there are still pinkish highlights to the edges of the petals.

While playing in Photoshop, though I love the clarity of the first shot. I thought about trying a nice 'glow' effect, that is often seen in glamour/fashion shots.  To do this, create a duplicate layer on top of the original, and apply a huge amount of Gaussian Blur to it.  Enough so that it is completely blurred, but still retains the shape and just a hint of the contrasting lines between the petals. Now adjust the opacity of that top level to let the super clear bottom layer shine through it.  You'll have to judge this by eye - there is no magic formula or 'correct' value.  The last thing I did was to apply a layer mask to the top layer, and used that to mask out the very centre of the blurred layer with a soft edged brush, allowing even more of the clear level to shine through, just in the very centre of the bloom.

Again, this picture doesn't really do the original justice but I don't have a copy of this one in Flickr I'm afraid.

Until next time
Happy Snappin'

Tuesday, February 18, 2014

Time to hang up my camera and find a new hobby

OK - I've always said it - I want to sell one of my pictures, just once, and preferably not to a sympathetic relative who just feels sorry for me.

Well, it only took 16,300 attempts, but... I'VE FINALLY DONE IT!.

Not only has someone seen, liked, and bought one of my pictures, but that someone is no less than the mighty National Geographic!!

I was rather skeptical at first when I woke up one morning last week, and blearily checked my email while making a cup of tea to wake me up, only to see an email saying something along the lines of "Nat Geo would love to pay you for one of your pictures - just fill in this form that gives us all your bank details..."  Well, I have lost count of the number of times I have won the Eurolottery - if I just send $100 admin fee to claim my prize, or the opportunities to assist with all manner of good causes who need money moved out of politically stifled locations, if only they could use my bank account as a conduit... so my immediate reaction was "Yeah, right- SCAM!!!"

But my ego was sufficiently piqued, that I decided to follow it up, by contacting Nat Geo via independent means, and asking if this was fair dinkum.  I was pleasantly surprised to get confirmation not only that the offer was genuine, but that they want my picture to go in a children's book about Meerkats (yes - it was one of my many Meerkat pictures).

I was worried about the fact the photo was taken in a zoo, but even after declaring that to them, Nat Geo have confirmed they do not need any kind of release form (phew).  This may be because there is nothing in the picture to identify the zoo (or even that it is IN a zoo) and there are no identifiable people in it - though I don't know how easy it is to uniquely identify a Meerkat... (but Meerkats don't count as people - apart from the one in the "Compare the Meerkats" adverts, maybe).  However, I think it is more likely to be because the photo will be used 'editorially' rather than 'commercially' (in broad terms - 'commercial use' basically means some form of advertising, whereas 'editorial use' means to illustrate - such as in a news story, magazine, or book.  So a picture IN a book is editorial, but a picture on the front cover (arguably) or a poster advertising the book, is commercial - at least, that is how I understand it).

So, that's it.  I've achieved my goal.  Time to hang up my camera and find a new hobby..?


I don't think so!  


It just means I need a new challenge to aim for - like actually being commissioned to produce something, rather than just having something seen online - or maybe framing and displaying some of my work somewhere beyond my house.  Don't know at the moment...

Though I still love to photograph nature, I want to start experimenting more with controlled lighting, for portrait and product photography - so maybe my new challenge will lead me along that route.

Wednesday, June 26, 2013

Nikon Standard Bag II Review

I just bought myself a new day-to-day bag for my kit, as the old one is wearing out.  A little research showed that there seems to be a bit of a gap in the market between the 'one body - one lens' type bags and the full blown backpacks that will take pretty much all your kit.  I have one of those already, but I tend to cram so much in that it gets a bit on the weighty side.  So I was looking for a bag that would take a body, 2 or 3 lenses, speedlight, and have a few pockets for bits and bobs.  There are a few 'fashionable' bags that may have done the trick, but I really wanted function over fashion.  I found the Nikon Standard Bag II which looked like it would fit my needs, and went for it.

The internal measurements, as specified, are 300mm x 180mm x 130mm (W x H x D), but what does this mean in terms of kit that'll fit?

Admittedly, my D3000 body is quite compact if compared with something like a D4, but the way I have arranged the bag is thus... divided roughly into thirds across its width.  On the left, the D3000 will lay on its back with any of my 3 lenses already fitted (the longest of these being the 55-200 f/4-5.6 - attached in the picture) and the lid will still close easily.  In the middle section, I created 2 small pockets with the velcro dividers (plenty of those provided), in which both my remaining lenses (18-55 f/3.5-5.6 and 50mm f/1.8 AF) will fit, with easily enough headroom to put my extension tubes in a neoprene sleeve (actually a stubby holder) across the top of them (not shown).  In the rightmost section, I created three slots from front to back, which hold one speedlight, the charger for the camera battery, and my little P&S camera with its charger too.

The lid contains a zipped net/mesh pocket, in which I have the camera remote, a spare memory card,and a lens cloth stashed away.


Pockets on either end of the bag are an ideal size for either a couple of filters each, or in my case, I have put a pair of Cactus v5 radio triggers in them (one in each end).  These pockets have velcro secured flaps, rather than zips.

There is a full width zipped pocket across the front, which has another zipped net/mesh pocket inside the front flap, and various open pockets sewn into the back (i.e. the body of the bag itself).  Two of those pockets are again nicely sized for single filters, but the rest look like they were designed for pens.  I seldom carry a pen in my camera case, in case it breaks and everything gets covered in gooey biro ink - so these pockets aren't much use to me just yet - I may think of a use for them though.

As if that weren't enough pockets, finally, there is another pocket across the back of the bag, though this is only really any good for slipping in a couple of sheets of paper or something very flat and flexible (I could fit, but wouldn't trust my iPhone in it for example).  It may become more practical as the bag loosens up but at the moment it is pretty tight once you get any amount of kit in the main body of the bag.

The lid fastens over the top and is secured by a couple of clips.  The overlap is sufficient that light rain and wind-borne dust would probably be kept out, but I don't think the bag is intended to be fully 'weather-proof'.  There is a comfortable handle (2 canvas type handle straps that are held together by a padded handle), as well as the usual detachable shoulder strap with a sliding padded section.


My only disappointment so far is that the bag has a couple of straps supposedly intended to sling your tripod off the bottom front.  These straps don't have any quick release clips, so anything you attach has to slide through them, and they are pretty short.  They are certainly too short to go around even my fairly modest Slik F740, so I am wondering just what kind of tripod they were designed to cater for.

Maybe, they are meant for an umbrella (and I don't mean the kind you'd use on a studio strobe).


So - I've managed to cram quite a lot of kit into my new bag... camera with all my lenses, my extension tubes, and a speedlight complete with radio triggers.  This should give me plenty of options to try out different things while out on photowalks now, and still keep things tidy - as long as it isn't too heavy.

Till next time
Happy Snappin'
Grum

Monday, May 6, 2013

Evening Exposure

Over the long weekend just past, Karen and I went to Dubbo, and stayed overnight at a wonderful place called Pericoe Retreat just outside of town.  It was a lovely location with 25 acres of property for me to wander around and photograph.  It was a glorious sunset, and just as I was returning to the house, they had turned on all the outside lights, and there was a beautiful deep blue sky above.  I couldn't resist the contrast of the orangey lights against the deep blue, so set about getting a photo.

As you might guess - there seemed to be no exposure setting that would capture full range from the lights shining on the building and grass, to the deep blue of the sky, so I took a number of shots exposed specifically for the sky, the building, and then the foreground grass, with a view to getting the best of each in PS later on.

Once home again, and with access to my PC, I chose the 3 shots that were best suited for each of the three areas, and opened them all in Photoshop, and then copied all three into a new image as separate layers.  I organised the layers in order from lightest to darkest, with darkest on the top.

Despite having the camera mounted on a tripod, the photos still didn't line up quite, so the first task was to auto-align the three layers, and then crop the result to the area covered by all three.

Next, I added a layer mask to each of the top two layers, then I took a fairly large and soft edged brush (set at 100% opacity), and with the top layer's layer mask selected, started painting black - effectively erasing part of the image to reveal the layer below.  Starting at the bottom of the image, I 'erased' all the grass and house from that layer - leaving only the deep blue sky.
Next, I selected the middle layer's layer mask,and did the same, but this time erasing only the grass.  This left me with the three main bands of exposed image - the grass from the bottom lightest layer, the house from the middle layer, and the sky from the darkest layer.

I did some further refinements and tweaking (which are not shown in the masks above).  The roof and surrounding trees were still a bit dark on both the top and the middle layer, so I masked them out and let the bottom layer show through there as well as the grass.  I also did a bit of repair work on the grass, to hide some doggy toys, and a couple of drought affected areas.  As a final touch, I found that the Pericoe Retreat logo on their website was a convenient PNG image with transparent background, so I 'borrowed' that, and placed it on the image, just to give it a little 'branding'.

If you ever fancy a visit to the Great Western Plains Zoo in Dubbo, you might consider staying at Pericoe Retreat yourselves - there are lovely photos to be had, and the Lamb Roast Dinner was to die for!!!  Tell them Graham sent you :D

BTW - I sent them a copy of the finished image, so take a quick squint at the screen saver on the PC in their reception, and see if they used it.

Keep those shutters snappin'
Grum.

Wednesday, March 13, 2013

Made in China

I've just returned from a business trip to China, where I was lucky enough to spend a weekend out with my boss - who is also a keen photographer.  This meant that he was very patient and understanding when I wanted to stop and take photos of things from a dozen different angles, experimenting with flash or natural light, or long exposures on the tripod. It also meant that he (having lived in China for 8 years or so) was able to take me to some interesting locations.

I stayed in Suzhou, which is an old walled city (about 2 hours inland from Shanghai), that also has a lot of canals - it is known as 'The Venice of the East'.  Beyond the city walls, the Suzhou Industrial Park has grown and expanded in the last 10 years, bringing business (and about 10 million people) to the area.

It is a place of huge contrasts, with the old city and the new commercial area with ultra modern buildings, as well as the wealthy and the poor, and the traditional ways of living sitting right next to vast arrays of apartment blocks.
 
Here are a few pictures of a traditional fisherman I found, in one of the canals around the old city, using cormorants to catch his fish. This way of fishing has been around for many hundreds of years, but it was interesting to see it still happening today, against a backdrop of elevated concrete roadways threading between towering apartment blocks (very carefully and tastefully excluded, so as not to spoil the ambiance of the pictures ;-D ).

The cormorants wear tight collars that prevent them from swallowing any fish they catch, and the fisherman then scoops them out of the water, retrieves the fish from their throat, and sends them back out for more.  At the end of the day, I guess the birds are fed, in order to keep them happy in their work.

I'll post some more from China soon, but until then...
Happy Snappin'
Grum.

Thursday, January 24, 2013

When enough is more than enough

There are times when we need to just step back and re-assess what we are trying to achieve.  We often get bogged down in a 'rut' of sorts, and fall back on using the same tools and methods to address every problem, where a change in approach may result in an equally acceptable (or even superior) outcome for less effort.

I had one of these moments the other evening.  It was my niece's birthday and so we were all at her house to sing Happy Birthday and eat cake, and of course, I was there with camera to take photos of her blowing out the candles and so on... Most times now, I can balance the flash with ambient light by using a longish exposure so that the candle flame still shows, but that wasn't my problem...

Our new grandson Will was there, as was an Auntie that hadn't met him yet, so of course, she wanted to have cuddles with him.  When she saw me with the camera out ready to take 'cake' pictures, she said "take one of me with Will...".  Now being only 3 weeks old, I wanted to avoid using the flash, but light in the room was dim, and provided by very directional downlights.

If I had time to consider and set up the picture, I would have moved her around the room to find the best ambient light, and probably used some extra lighting and reflectors to get rid of the harsh shadows from the downlights.  But this was supposed to be an impromptu 'quickie' - that turned into an embarrassing nightmare.

After just turning the flash off (but with shutter speed of 1/30 already locked in ready for the candles on the cake), shot 1 produced a very underexposed image at f/5.6 - the max aperture of the kit lens I was using.  For shot 2 I tried in P mode, and got an exposure that was 1/2 second and impossible to handhold.  For shot 3 I tried increasing the ISO to 800 which is about as far as I can push it in low light on my D3000 without getting annoying noise.  The shutter speed came down but not really enough, and I still had really harsh shadows from the downlights on Aunties face.

After three failed attempts (and time spent chimping and changing settings each time) the 'moment' was pretty much gone.  It was turning into a situation that I needed more time to assess and solve, but Auntie was getting bored, I was getting frustrated, and my niece wanted to eat her birthday cake...  Will was fast asleep and couldn't have cared less, but I had to do something quick to retrieve the situation.

After a moment's panicked thought, I reached in my pocket, and whipped out my iPhone.  A couple of finger swipes and 5 seconds later, I had a relatively good picture that looked fine on the phone's screen, and was really all she wanted in the first place.  She didn't want poster sized glossy prints made, or even to display the picture on her 5 foot wide HDTV screen - she just wanted something for the 3.5" mobile backlit photo album from Apple, that everyone seems to carry these days - me included (he admits reluctantly).  In these situations, a mobile phone camera with all it's built in point and shoot logic, may be all you need.

Today's lesson learned?  You don't always need perfection - sometimes 'OK' is good enough.  The Pareto Principle (more commonly known as the 80/20 rule) says something like this - you can achieve 80% of an outcome with 20% effort, but then it takes the other 80% effort to get that final 20% of the outcome.  Sometimes - the 80% is all you really need in the first place.  So don't knock yourself out striving for perfection in every photo - admirable though that goal is, your sanity will surely suffer!

Until next time
Happy iSnappin'

Grum.


Sunday, January 13, 2013

Happy New Year, and welcome Will (also PP - Example 4 : Glamour Glow)

Happy New Year everyone!  I hope Santa was kind to you over Christmas - he was to me.  I got a whole bunch of lighting stuff, including a Yongnuo 565EX flash and another Cactus v5 unit to trigger it, a 60cm softbox, a snoot with grids that can fit on one of the flashes, a couple of light stands, a couple of flash brackets, a flash bracket on a huge bulldog clip, and a whole bunch of grips for holding up backdrops, reflectors, etc.  I am looking forward to doing some product and portrait photography using all my new gear, and my New Year's Resolution is to try and build the confidence to do some 'proper' portrait work - we'll see how that goes ;-)

The other thing I got - 3 days after Christmas - was a grandson to take photos of.  He came along a month early and caught us all on the hop, but now he is 2 weeks old and life is beginning to settle down again (though his parents probably think differently).  Here is a picture of William (Will) Smith aged 2 weeks.

I've given this shot a bit of PP, which I'll describe for you (this is a photography blog, after all).  The first thing I did was to do a little colour correction, lightened it a little, etc., and then desaturated it to monochrome (why bother with the colour corrections first?  Well, it does actually make a difference, believe it or not.  It isn't really something I can easily explain, but try it and you'll see what I mean.)  Once desaturated, I played with the lighting again a bit more, and then did a little 'glamour' trick I learned... duplicate the layer, and then apply a fairly substantial Gaussian Blur to the top layer - I used 25 pixels radius.  Then reduce the opacity on the top layer to let the sharp layer below begin to partially show through - I reduced mine down to about 30%.  This gives the image a nice soft 'glow' without it looking out of focus. Finally, I applied a layer mask to the top layer and painted black on the eye to let the catchlights shine through sharply, without any of the Gaussian Blur applied.

I have been charged to do a picture of Will every month for the first year, to go in one of those special photo frames that has a slot for each month.  At the moment, Will couldn't care less about me snapping away all the time, but I think it's already wearing thin with Mum & Dad, so it may be a challenge to get access to him every month for his official portrait - we'll see.

I've also started putting pictures into Project Flickr again this year (running for its third year now?)  The first theme of the year was Happiness - which seemed quite appropriate given that we had a new addition to the family, and it prompted me to start it up again.  Next week's theme is Body Parts, and I had been planning to try and get a few shots of Will's tiny feet and hands - so they could be appropriate entries (once again - if I get the opportunity...)  I know that I won't last the whole year at Project Flickr - I have a few busy periods this year where I know hobby time will have to take a back seat for a while, as well as a spell over in China where internet access is severely restricted, and many 'social' sites like flickr and facebook, are forbidden or censored.  Having said that, I am looking forward to going back to China again, as I will have 3 days to myself while I am there, to wander around with my camera, and see what I can photograph.

OK - well that's my news for now.  Over the coming months, I am sure that Will will probably be featuring from time to time, and I'll also post some of my experiments with all my new lighting gear - which I am really looking forward to playing with.  Post a reply below telling what pressies Santa brought for you, and if you made any New Year Resolutions  - especially photographic ones.  I'd love to hear from you.

Until the next time
Happy Snappin'
Grum

Saturday, December 22, 2012

PP - Example 3 - Applying a textured background


After watching some more of Gavin Hoey's short video tutorials, I was inspired by one he did at the beach using some pebbles to create a subject to photograph, and then put a texture around it in Photoshop.  This is my attempt to recreate his image.  He made it all seem so simple, but then again, I think he probably knows Photoshop a lot better than me  ;-)

Step one was to take a picture of something to be the main subject.  He built a little pile of pebbles and so I did the same.  Even my pile of pebbles was nowhere near as artistic as his.

Next, I looked around for some nice textures.  The area of beach near my work has some very fine sand, some tesselated rocks, and some coarser sand with bits of broken shell and so on, so I took several photos to try and get something I could use once I got back home to my computer.  You'll see I took some of weathered wooden posts and tree bark as well.  Here are a few samples... 


I decided on one of the coarser sand shots to use for my texture (the top middle one here, actually).  It was a quite arbitrary decision based on no prior knowledge or experience whatsoever.  It was just a 'pick one and run with it' decision. 

Now, according to Gavin's video, he suggests duplicating the texture layer so you have 2 copies, and then rotating one 180 degrees, and then playing with different blending modes and opacity to recombine them before merging them back into a single layer.  This helps even out any differences across the width or height of the texture image.  The shot below shows the result from my 2 layers in Photoshop, and the blend mode and opacity I used.


The next thing is to take the texture layer and add it to the pebble pile image.  Again, playing with opacity and blending modes provides an endless number of possibilities to experiment with, and you can even add adjustment layers to change the hue, saturation, contrast, etc. on the texture, as well as the original image.  Then, using a layer mask on the texture layer, use a large brush with 0% hardness (i.e. soft fuzzy edges), to 'erase' the centre of the texture layer and let the pebbles shine through.  The next shot shows how I combined the texture with the pebble picture, and used a mask to make a hole in the middle area of the texture.  I have left the texture a little more visible than in the finished picture, so that you can see the effect more easily.

I did a little more work on the original image to crop it, and adjust the lighting a little to reduce that harsh shadow under the lowest pebble, and also placed the whole finished image into an expanded white canvas with a drop-shadow - here is my finished article.  I hope you like it.  Who would guess that the texture was actually sand from the same place as the pebbles?
I probably didn't use the same blend modes as Gavin - mainly because I was doing it from memory after watching his video yesterday - but I was quite pleased with the overall result.  It just adds a little interest to an otherwise boring and blown out background, without detracting from the main point of the photo.

Click here to check out Gavin's version.

Well, as you can see, this was posted a little while after the Mayan's predicted 'end of the world as we know it', though I was putting it together as that moment came and passed (having already lived through 1984 and the Y2K bug, I was so worried about it, that I needed something to keep my mind busy). 

So, now that I can fairly confidently expect to be around for the foreseeable future, I'll take this opportunity to wish you all a very merry Christmas, and a safe and happy new year.  Enjoy time away from work, with your loved ones, and your cameras - obviously.  I hope you all get the photographic pressies you asked Santa for (I gave him a BIG list... but I've been a very good boy so I should be on his 'nice' list).

I'll see you again in 2013 - until then, happy Christmas snappin'
Grum

Wednesday, November 28, 2012

The Inverse Square Law (part 2) - in plain English


Having had a few days to mull over the concepts I introduced in the last post, now - I want to explain the practical application of this principle.  In place of the first beer bottle, lets use a model and instead of the second bottle, we'll use the wall of my imaginary studio as a backdrop...


The back wall of my studio is 6 metres behind the model, and the model is 1 metre from the softbox.  If you note the exposure for the model, and then do the same for the back wall, you should find that there is a little bit over 5 stops difference between them.  So if you take the picture exposed for the model, the back wall will only be receiving about 1/36th of the light, and will look pretty dark.


Now- leave the light where it is (and the back wall - obviously... I don't want the roof to collapse), but move the model back, so that he/she is just 1 metre from the wall - and therefore 6 metres from the softbox.  NOTE - our distance multiple unit is now 6 metres, and therefore the wall is now only 1/6th of a unit behind the subject.  In our examples above, we lost 2 stops of light in the first movement of 1 distance unit, so we should lose considerably less than that in just 1/6th of a unit - maybe even less than half a stop.  This means that if you expose the picture perfectly for the model, the back wall will only be half a stop darker, rather than the 5 stops we saw before - hardly even noticeable.


Now a final experiment - bring the softbox back up close to the model again - to 1 metre.  You now have 1 metre from the light to the model and 1 metre from the model to the back wall.  So bringing the light that much closer - surely, it will make the wall brighter, won't it?  Let's see - adjust your exposure for the model and, uh-oh... the wall just got darker again!  Why?  Remember in our first experiment, we lost 2 stops of light when we moved the subject back 1 distance unit, and this should be exactly what we see here - the model will be perfectly exposed, and the wall will be 2 stops darker, as the wall is 1 distance unit behind the model.


And here are a few test shots I did, just to prove the theory...


So, the upshot of all this is 3 simple rules...

  • If you want your subject against a really dark background, have the light source close to the subject, and the subject far from the background.  
  • Alternatively, if you want the subject and background with similar exposure, then have them relatively close together, and the light source some distance away (maybe 5 to 10 times the distance between the subject and background).  
  • Finally, if you want the background just a little darker than the subject, then have the background a similar distance behind the subject as the light source is in front.  


Sounds simple when you say it like that - so simple in fact, maybe I'll start the post off with these rules.

Happy snappin'
Grum

PS - That's it, you can leave my studio and go back home now... dream's over, go on, go home!

Monday, November 19, 2012

The Inverse Square Law (part 1) - in plain English

When it comes to flash photography, or studio lighting, you won't get very far before someone mentions the dreaded 'Inverse Square Law', and then starts quoting lighting ratios and f-stops of dropoff, and all sorts of frightening sounding stuff.  I must admit, I was full of trepidation when I first tried to understand it, and I was left with only a feeling of vague understanding, and lacking that 'eureka' feeling that I had completely grasped the concept.

It is a hard subject to describe without getting bogged down with all the technical details, but the concept itself is actually very easy to understand.  Once you get the concept clear in your mind, then attacking the technical side becomes a whole lot less scary.  So - that's what this post sets out to do - explain what it means in a practical sense, explain the concept, and finally explain (in simple terms) the technical bit with real examples.  I'll split it into two parts, so as not to fry your brain...

I'll start by stating the basic rules of application, and then explain why these work the way they do.

  • If you want your subject against a really dark background, have the light source close to the subject, and the subject far from the background.  
  • Alternatively, if you want the subject and background with similar exposure, then have them relatively close together, and the light source some distance away (maybe 5 to 10 times the distance between the subject and background).  
  • Finally, if you want the background just a little darker than the subject, then have the background a similar distance behind the subject as the light source is in front.

The rules above won't mean much to you until you either try them out and see them working, or read on to get an appreciation of how these results come about.

In order to help visualise this, try an experiment.  Get a light source of some kind - anything will do, a desk lamp, a torch, anything.  Now, in a darkened room, set your light source up next to a light coloured wall, pointing along the wall.  Step back and observe the brightness of the light falling on the wall at various distances from the light itself.  Close to the light, it will be very bright, but it will quite rapidly get less bright, and then less bright again, and again... Obviously, in real life, this is a gradient rather than 'steps', but to help understand the concept, let's break up this gradient up into four imaginary brightness areas - "really bright", "quite bright still", "getting darker", and "pretty dim".

OK - here is the important bit.  Let's measure the distance from the light that falls into the category of "really bright", and for argument's sake, say it is 30cm.  Now measure the distance from there to the end of the "quite bright still" area, and this might be 1 metre.  The length of the "getting darker" area might be 3.5 metres, and the "pretty dim" area might extend for another 8 metres.


Now - I just made these numbers up to illustrate a point - and that is that the rate at which the light fades is not constant.  It drops off very quickly at the start, and then less and less quickly.  The key thing to understand here is that if your subject is quite close to the source of light, somewhere in the "really bright" area, and you move it away from the light by 30cm, it will have a radical affect on the exposure, as the level of light is changing very quickly at this distance, and the subject will now only be in the "quite bright" area.  However, if your subject is 5 metres from the light, and you move it back by 30cm, it will have much less impact on the exposure, because the light level is changing much slower at this distance, and the subject will have been in the "pretty dim" area the whole time.

Let me just state that again - in fewer words this time, without the explanation.  A small change in the light to subject distance when close to the light source, will require a big difference in exposure.  The same change in distance when further away from the light source, will require only a small difference in exposure (if at all!)  Savvy?

Now that (I hope) you have begun to grasp the concept, let's give you some real figures so you can appreciate what it means to your camera settings, and start to understand the real life scenario.  But first of all, close your eyes, and drift into dream mode, and come on over to my studio, where I have a nice strobe in a big soft box set up for you, with Cactus V5 radio triggers, and you'll have a great camera in your hands (of course, that would be a Nikon D3000, wouldn't it?) Pssst - now, open your eyes again so you can carry on reading!!

So here in my studio, sitting 1 metre in front of the softbox, is your subject.  It could be a beautiful girl, a handsome guy, or a bottle of beer someone brought to Australia for you from England (hic!) - yes, let's go with that one.  You set up your camera to expose the bottle perfectly, and take the shot.

NB - From now on, all the distances we talk about will be in multiples of the distance from light to subject (which in this case, is nice and conveniently 1 metre).  I'll call these 'distance units', but remember, it is just the distance from the light source to the subject.


Now place another bottle of beer 1 distance unit (e.g. 1 metre) behind the first, and take another shot without changing any settings, and... whoa - where's my second beer gone!?  Being 1 distance unit further away, there is only 1/4 of the light reaching the second bottle - that is 2 stops of light lost over the first unit of distance.

Now let's move the second bottle back another distance unit, so it is now 3 distance units (3 metres) from the light.  At this distance, only 1/9th of the light is reaching the it.  Now the interesting thing is that although you doubled the distance, you have only lost a little over 1 stop of light this time.

Another metre (or distance unit) back, and now just 1/16th of the light is reaching the second bottle, but this unit cost you even less than one stop of light.

From here on, the loss of light is becoming more and more negligible.  You can now go another FOUR distance units, and only lose 2 stops of light.  Remember - you previously lost 2 stops of light just in that first unit!

Hopefully, you are getting the idea...?  Good.  Now, take a break, and come back in a few days for part two (when I've had a chance to create a few more graphics).

TTFN
Grum


Friday, November 16, 2012

PP - Example 2 : Twice the taste

Over the last few days, I've been looking into retouching and have learned a few new techniques, and also noted that even the pros can spend an hour or more, tweaking an image to perfection.  So I gave my beer bottle another go.  Here are the results - original on the left and tweaked on the right.

First of all,I took two pictures - one with the main label lined up, and then a second with the neck label lined up.  The first job was to cut and paste the neck off one to the body of the other.  This went quite easily, with only a minimum of healing brush and cloning required to disguise the join where water drops were suddenly cut in half.  I think that just having the labels aligned makes a huge difference!

After merging these two into a single layer, I then used a mask to mask the bottle and reflection, while I painted the background white, discarded it as too clinical, and then applied a uniform gradient of a very pale blue (could have been a bit stronger in retrospect).  I then masked everything but the reflection part, and applied a white gradient to tone it down a bit.

The final step was to do some light sculpting.  This involves adding a new layer at the top, switching it to overlay mode, and filling it with 50% neutral gray.  Because it is 50% neutral and in overlay mode - this has no visual affect on the image.  However, if you then paint on it with either a black or white brush, it has the effect of darkening or lightening the image. So, I masked off everything except the bottle, and then I used a very soft large brush at about 5-10% opacity with white, to run up and down the middle of the labels and eliminate that mid-line shadow, then with black down the right hand side to tone down that flash highlight.  The image to the right shows what that gray layer looked like if I took away the actual image, so you can see the areas that were darkened or lightened.

OK- the difference I made was nowhere near as pronounced as those of the pros doing the demos I watched, but I was quite pleased with it as a first effort.

Until next time
Happy Snappin',
Grum

Saturday, November 10, 2012

A little taste of home

A family friend who has just been back to the UK for a visit, brought back a bottle of Spitfire for my son, so I figured I'd hijack it before he could drink it, and use it as a subject to practice my lighting on. This was the result of my first attempt - I can see some areas for improvement, so I'll have another go at it if I can persuade him not to drink it first...

I want to try and find some software that will allow me to do some setup diagrams - until then, I'll just have to try and describe the setup for you - but I've included a photo of it below.

The whole setup was done in the kitchen on the worktop, with a very DIY studio.  First off, I draped a white cloth across the worktop, with enough hanging off the back to form a backdrop.  Then I placed a sheet of glass (rescued from a broken scanner) on the cloth to provide a reflection.  I propped up a breadboard at the back and draped the rest of the white cloth over it as a backdrop.  I had the camera on the tripod level with the label on the bottle, giving a nice low angle so the rear edge of the glass wouldn't show.

For lighting, I used a speedlight off-camera with a radio trigger.  This was placed to the right of the camera, slightly in front of the bottle, to provide a bit of a highlight, but pointing past the bottle and onto the backdrop.  I used the omnibounce and flash spread set to 14mm to get an even spread across the backdrop which was less than 1m away.  The flash was set to 1/16th power.

I set the camera to 1/160th and f/5.6 in manual mode, and using my 18-55 lens, zoomed in to catch some space above the bottle, and an equivalent amount of the reflection below.  I took a test shot without the flash to make sure I had eliminated any ambient light, so that the only light in the picture would be from the flash - mainly being reflected back from the backdrop.  Unfortunately, being lit from behind, this put the front label in shade, so I used a sheet of white paper as a reflector right next to the camera lens on the left, to reflect some of that light from the background onto the label and illuminate the front of the bottle.

Of course, the most important detail was to leave the beer in the fridge for a few hours, to ensure I had some nice condensation on the bottle (though this could have been added at the end using a water spray), and that it was nice and cold when I drank it (oops, sorry son!).

Here's the setup picture...


So - I mentioned I felt there was room for improvement...

  • The background is extremely white on the right, but has a slight blue cast top left as the light started to drop off - I'm wondering if I could exaggerate that a bit,by using a snoot or some other modifier to restrict the light from the flash, or zoom it in to 105mm rather than a wide 14mm spread, and have a more dramatic graduated background.  My son suggested having a Union Flag instead of plain white.
  • The highlight on the right hand side is a little too bright, but taking the flash down a stop made the whole image too dark.  Perhaps a diffuser between the flash and the bottle would have helped.
  • There is still a darker area right the way down the middle of the labels - especially noticeable on the Spitfire outline on the neck label.  Perhaps a bigger/better reflector would have put more light on the front.
  • The neck label is not quite in line with the main label. I may be able to rectify this by taking a second shot after rotating the bottle slightly so the neck label is lined up with the camera,and then combining the two shots in Photoshop (10,000 miles is a long way to go to buy another bottle which IS lined up).
Let me know what you think, and if you have any ideas how to improve it.
Happy Snappin'
Grum

Monday, November 5, 2012

On display

I am really chuffed to announce that I now have two of my photos on permanent display at a small private gallery, in Swindon in England.  OK - perhaps I've glammed it up a bit...  by small private gallery, I mean someone's house, but they did specifically ask for two of my pictures that they 'fell in love with'.

They are my wife's brother's wife's parents, and they came out to Australia at the end of last year to visit various family.  They had seen one of my photos on facebook, as Karen had it as her homepage picture (in fact it is one of the early morning misty tree shots you can see in the 'Dabbling at dawn' post), and they asked if they could have a print of it to take home with them.  Of course, how could I turn down such a boost to my ego, so I had a 12x8 print made for them which I gave them on their last day here.

Earlier this year, we went to Tasmania for a few days, and while there, I took a shot of the moon reflecting across the bay where we were staying.  Ironically, Karen decided to use that as her facebook cover for a while, and once again, they saw it and commented about it - saying how they'd like a copy.  So, as we were travelling back to the UK for a visit in August, I had a 12x8 copy made for them as a surprise, and took it over.  We went to their house for a meal one evening, and I must say how proud I felt to see the misty tree picture hanging on their wall.  It would be great to go back and see them both up.

So, though I still haven't actually 'sold' a photo to a stranger, it's a step in the right direction (perhaps I should have left some business cards with them, and made them my UK agents?)

Happy Snappin'
Grum

Bad Blogger!

Oh dear - it's like going to the dentist... the longer you leave it, the harder it is to face up to how long it's been since the last check-up, and you just know it's gonna hurt!  Yes, another 7 months has passed without a single post... I am not going to even try to bore you with excuses, so just accept my apologies, and let's just jump straight in.

First, a brief potted history of the last few months... I've been to Malolo Island (Fiji) again earlier this year - it is such a great place to relax that it is turning into an annual pilgrimage for us - I'd love to take my camera scuba diving with me - but that's a whole bunch of expense that I think I'll pass on.  This year, we flew in a seaplane from the main island out to Malolo itself, giving me a brief chance to do some aerial photography.  Then we traveled to the UK for a couple of weeks, via Paris for a couple of days on the way there, and Abu Dhabi for a couple of days on the way back.  Paris was a great place to stop and I got some nice photos there (Eiffel Tower, Eiffel Tower, Arc de Triomphe, and uhm... Eiffel Tower), but the UK was all about visiting the rellies, and opportunities for photography did not really abound.  There were some stunning buildings in Abu Dhabi, but it was so hot, most of my pictures were taken from within the air conditioned comfort of a dust covered Land Cruiser!

Our zoo membership expired, and when we didn't renew it straight away, the zoo offered us an extra 3 months for free - BONUS!!  So we've just renewed it again, and I'm looking forward to many more visits (he he - watch out for loads more Meerkat pictures :-] )  We never managed to get out to the Western Plains Zoo (that's the other zoo that is covered by our membership, but it's a good 8 hour drive away) during our last membership period, but maybe we can get there this time.

I've discovered a nice little area of bush/woodland near where I work, that has opened up more lunchtime opportunities for wildlife photography, especially birds, though it has also enlightened me as to some of the hazards of wildlife photography - even in a seemingly innocuous area of woodland just 200m from my office - like being dive-bombed by angry nesting magpies, bitten by giant mosquitoes, being on constant watch for deadly snakes and spiders, and finally, taking home a blood-sucking passenger or two...  It's all in a day's work ;-)

I've tried my hand at photographing the rugby out in the park near me during the winter months, and also tried to get some shots of my niece doing her gymnastics and physie competitions (in poorly lit sports halls, with no flash allowed...)  Neither of these attempts were particularly successful, but I'll maybe post some of the pictures and discuss the difficulties later.

I feel like I've reached a decision point in photography - I do enjoy photographing anything and everything, but feel like I'm just drifting and not really advancing my skills in any particular direction.  I'm a 'Jack of all trades, but master of none...', so it's time to choose a 'specialist subject' as they used to say on Mastermind ("I've started, so I'll finish.").  While I'd really love to do sports photography, I recognise that the pre-requisite of spending $1000+ on a nice bit of glass is somewhat prohibitive, and I have decided instead to learn more about lighting, and using it for product and portrait photography, which I can do on a small scale far more cost-effectively with a 'budget' DIY home studio setup.  Developing the lighting skills on inanimate objects (while hard enough) will be the easy part - developing the skills to direct people is the bit I dread but really want to be able to do...

I already have my daughter's SB-800 on long-term loan (thank you for never asking - but I'll give it back one day, I promise) and a Cactus V5 Duo radio trigger set, and I've purchased a cheap set of 2x500W workshop lights for some constant lighting.  I'm hoping to supplement this with another (cheaper) speedlight, some proper light stands, etc., as well as building myself a backdrop holder, and makeshift supports for reflectors and so on ("Stick-in-a-can" type, a la Jim Talkington).  Eventually, I can invest in one or two actual studio strobes perhaps, after I build up a selection of stands and modifiers (and learn how to use the speedlights effectively)...  I bought myself some white and black material for backdrops, and some white and black sheets of card for making reflectors this weekend, and am waiting to lay my hands on some empty paint cans - lucky one of my sons is a painter.

OK - enough for now, and lunchtime is over so I'd better get on with some work.   I'll be back with some actual photos in the next couple of days (or 7 months...)

Happy Snappin'
Grum

Sunday, April 1, 2012

A day at the zoo

Karen & I took a year's membership of Taronga Zoo last year, and we are about 8 or 9 months into it now.  Yesterday, we went and visited for probably the 4th or 5th time. It is so much nicer to be able to take your time walking around and actually observing the animals for a while, knowing that you can come back and see a different part of the zoo next time, rather than rushing around trying to do the whole zoo in one visit...  If you are interested in photographing animals, and have a zoo within a reasonable travel distance, this is something you may want to look into.  I've found it has presented me with some great opportunities (and I've fallen in love with the meerkats).

At Taronga, the meerkats have a great enclosure with lots of sand to dig in and tree stumps to climb around, and the whole thing is sunk about a metre below the observing crowd.  However, the wall must warm up in the sunshine, and one of their favourite places to be, is sitting up against the wall, right underneath those people watching.  Often people will come and look out into the enclosure and not see any meerkats, totally unaware, that they are quite literally under their noses.  With my 55-200, I can get some quite close shots, and the SB-800 flash is powerful enough to give some fill and lessen the harsh sunlight.

Taronga have had quite a few baby elephants recently, and I think there are currently 3 or 4 youngsters.  Here are a mother and her youngster, that I was lucky enough to get a clear shot of.  Because of the youngsters, this part of the zoo is always busy, and their enclosure is quite big, so the 200mm stretch of my lens isn't always good enough to reach the elephants, but today, I got lucky.

It was quite a bright sunny day,and I was having a lot of problems with lighting, as I often found myself either shooting into the sun and getting over-exposed shots with haze and flare, or shooting from the sun into deep shade, and getting very dark images.  To try and counter this,I was playing around with my settings a lot, and this compounded my woes, when I would forget to set things back again, and miss a shot :(  I lost count of the number of times this happened to me, and the shots I ended up having to discard when I got home and looked at them on the screen.

The chimpanzees have just got a new makeover in their enclosure, which again, is so big that I have to rely on cropping even my 200mm pictures, when the chimps are at the far side or up in some of the huge climbing frames they have.  In this shot, One of them was demonstrating a feature I hadn't noticed before, and also their grasp of technology, while a younger chimp looked on.  Inside the 'rock' is some form of food - I don't know if it was insects, or juice, or what, but the older chimp had a stick that he was pushing through a hole in the rock (you can see it just above his left wrist), down into whatever the food was, then pulling it out and eating it off the end of the stick.  The youngster sitting on top of the rock had an apple in his hand, and I could just imagine him saying "That's a lot of hard work for very little of a mouthful each time - here, have an apple - it's much easier..."

 The giraffes have a great spot, looking right out across the harbour to the Opera House and Sydney Harbour Bridge, and this can make a spectacular backdrop, but I prefer to try and eliminate anything man-made in the photos, so that the animals are portrayed in a natural setting - well, when I can, anyway.

Obviously, it isn't always possible.  In particular, I have been repeatedly frustrated trying to get good shots of the tigers and their cubs.  Firstly, it is always so busy; then there is the fact that you have to shoot through glass, which is far from clean, and quite severely scratched in places; and finally, the enclosure is quite shady, so the few shots I have got, have ended up blurred due to low shutter speed.  Their outclosure (it is the people that are enclosed in a little glass bubble) is also dominated by a large, very obviously man-made raised platform that the tigers love to lay on, so there is little chance of a 'natural' look.  How I would love the chance to get a clear shot either without the glass, or with time and space to figure out a way to shoot through the glass.  Anyway, back to the giraffes - in this shot, I liked the contrast of the colouring against the dark green background.  Wish I could have cropped the fence out a bit better though.


Finally, what trip to an Australian zoo would be complete without seeing a koala.  The enclosure at Taronga has a circular walkway that rises up from ground level through the trees, to an observation deck at the height of the sleeping koalas.  It offers an otherwise impossible view of koalas that you just couldn't get in the wild, as you would always be looking up into the tree from the ground.  It is a very privileged view of their habitat you get at Taronga.

So what valuable lessons did I learn at Taronga?  Take a lens hood - that's the first thing.  It makes shooting into the sun a lot easier, by cutting down haze and flare.  If you are moving away from auto settings and starting to use aperture or shutter priority, or even full manual - then you must remember to re-check your settings each time you move from one location to another.  Circumstances that are correct for one situation - like selecting f/22 in a sunny area, will fail miserably in another area - such as a shady area, because you'll suddenly find that you are taking pictures at 1/4 second with a 200mm focal length (not a good combination - no matter how steady your hands are).  Finally, choose your viewpoint carefully, to try and get more natural looking shots where you can - but accept that it isn't always possible.


Till next time - happy snappin'
Grum


Friday, March 23, 2012

Long time, no see... (again)

It's been a while since my last post - quite a long while!  Apologies all.
So what's been happening in my world..? Well, photographically speaking, I got a set of extension tubes at Christmas, and so for the last couple of months, I've been playing a bit with macro shots.  Here're a few of my more successful shots...


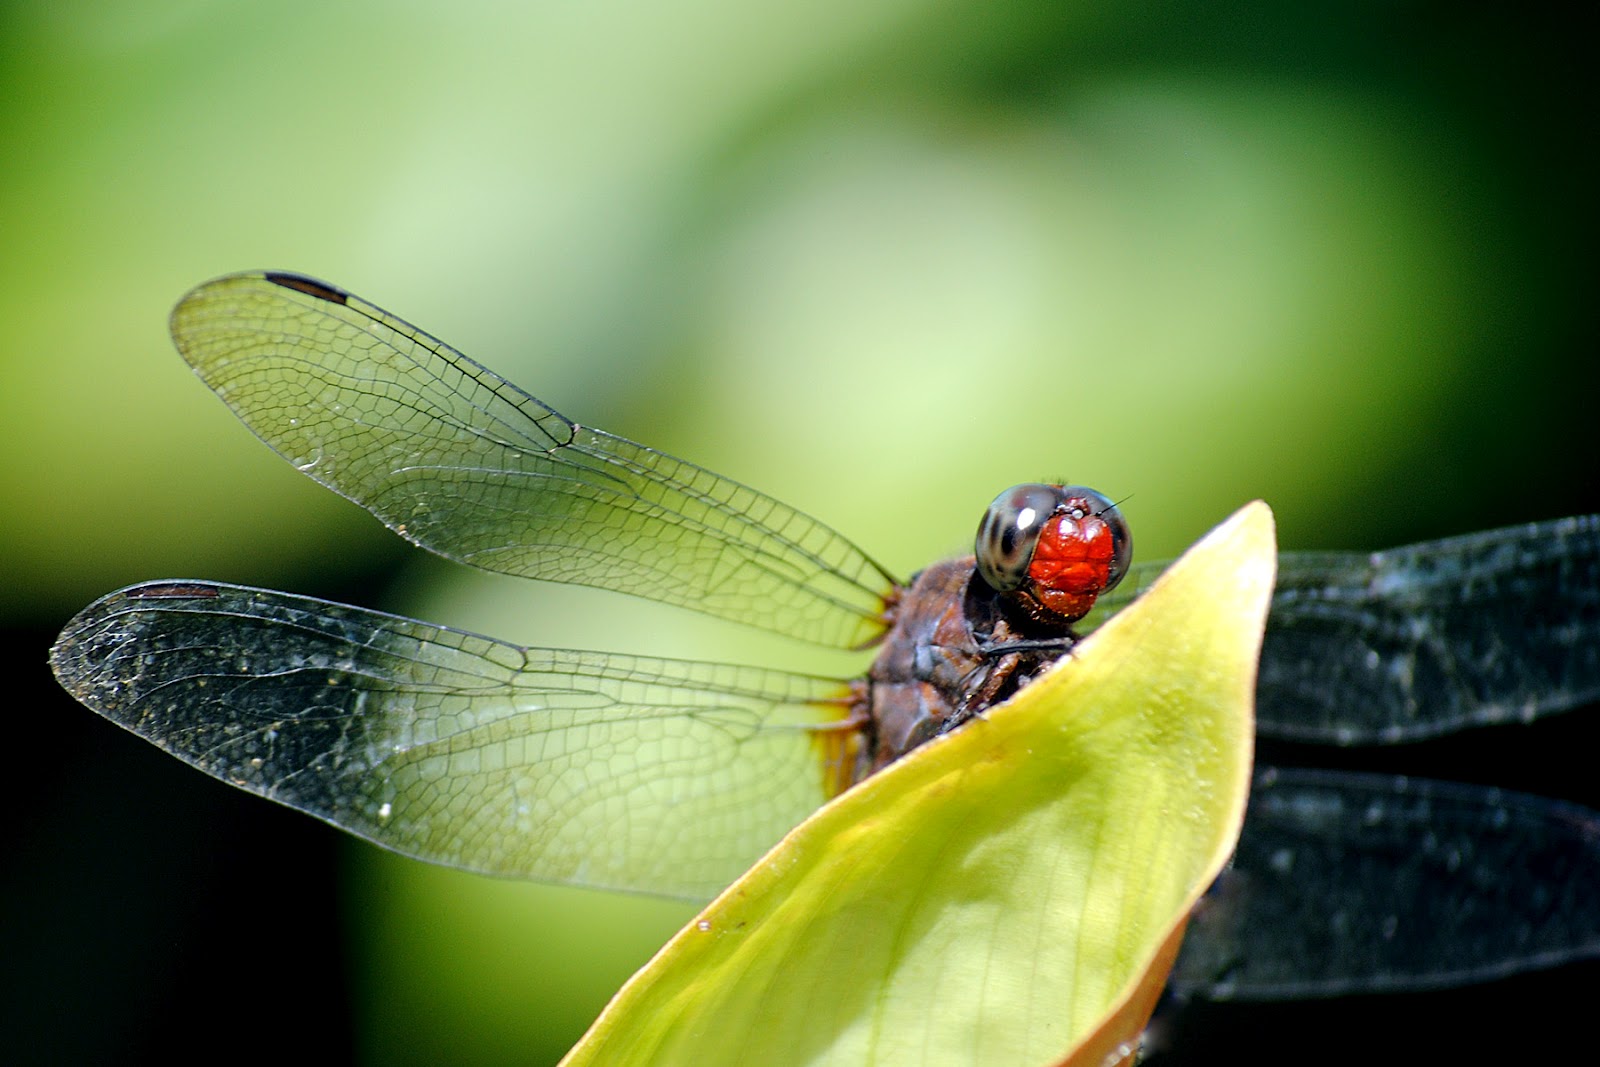
This dragonfly was buzzing around the pond in our garden, but to get this shot, I was standing with one foot each side of the pond, which was a little wider than comfortable :-o
I got a few more 'classic' shots, but quite liked the angle of this one looking up from below the leaf it was settled on.


I went down to the beach one lunchtime, in search of macro subjects for a change, instead of the usual surfers and seabirds (I've also found there is a pair of Kestrels that have adopted the area too - more on that in another post).  After 40 minutes of finding nothing except crabs that hid in the rocks as soon as I approached, I had given up and was heading back to the car, when I found this little fella who was brave enough to let me get within a couple of feet and take some shots.


The main thing I have found about macro work, is that doing it handheld with moving subjects is ******ng difficult!!  The working focus range is severely restricted and depth of field similarly constrained.  If you have a static subject, and a tripod, it's not so bad because you can fiddle and adjust to your heart's content - but nature doesn't respect a photographer's need for setup time, and creatures also get very edgy when you try and too close to them - so I ended up with lot's of empty shots and out of focus ones too.


Here's one I tried as an experiment, of a static subject one evening.  Those little turquoise thingies are only about 2mm long.

I haven't really figured out exactly what combinations of the three rings and my two zoom lenses at various focal lengths does, yet.  But what I have found is that the zoom from 18-55mm makes surprisingly little difference on the 'zoom' and acts more like a focus field shift instead.

The tubes I have are Kenko, and are specifically for the Nikon (they do them for Canon and probably other makes as well). I like the fact that they have all the electrical connections that allow auto-focus, and all other functionality of the lens to be used.  A set of tubes can be picked up a lot cheaper than a macro lens, and can be used with all your existing lenses to provide a lot of combinations to experiment with.  If you are thinking about having a 'play' in the macro world, these would make a very good starter for a reasonably small investment.  The good thing about them is that they have no glass elements, so there is no loss of quality - just an additional stop or two of light loss due to the increased distance between lens and sensor.  All the photos I've tried so far were with the middle of the three tubes, which are 12, 20 and 36mm respectively.

So to summarize the technical considerations of macro photography with extension tubes...
 - the focal range is severely shortened
 - the depth of focus is also extremely shallow
 - for any given aperture on the lens, the increased distance to the sensor will lose you a stop or two
 - the minimum focus distance of the lens is brought far closer to the front element of the lens
 - (in fact with some combinations, the minimum focus is actually within the lens! I have one picture of
     specks of dust actually on the lens, perfectly in focus...)
 - the close minimum focus means that the subject is sometimes in the shadow of the lens - you need
     to be careful about lighting conditions, and it is why pros use a ring flash for macro work

 - all these elements combine to make hand-held photography a 'challenge' unless you have great light


That said - it's certainly a challenge I am enjoying, and when you get a single great result, it makes it all worth while.

Until the next time (I promise it won't be 6 months this time)
Happy Snappin'
Grum